1.Docker安装Nginx并启动
#没有安装的情况下会自动安装,可以指定版本
docker run -p 80:80 --name nginx -d nginx:1.10

#将容器内的配置文件拷贝到当前目录
#别忘了后面的点
docker container cp nginx:/etc/nginx .

#修改文件名称并把这个 conf 移动到/mydata/nginx 下
mv nginx conf

#终止原容器
docker stop nginx

#执行命令删除原容器
docker rm nginx

#创建新的 nginx;执行以下命令
docker run -p 80:80 --name nginx \
-v /mydata/nginx/html:/usr/share/nginx/html \
-v /mydata/nginx/logs:/var/log/nginx \
-v /mydata/nginx/conf:/etc/nginx \
-d nginx:1.10

#给 nginx 的 html 下面放的所有资源可以直接访问
drwxr-xr-x. 3 root root  34 Oct 17 07:49 html
2.搭建域名访问
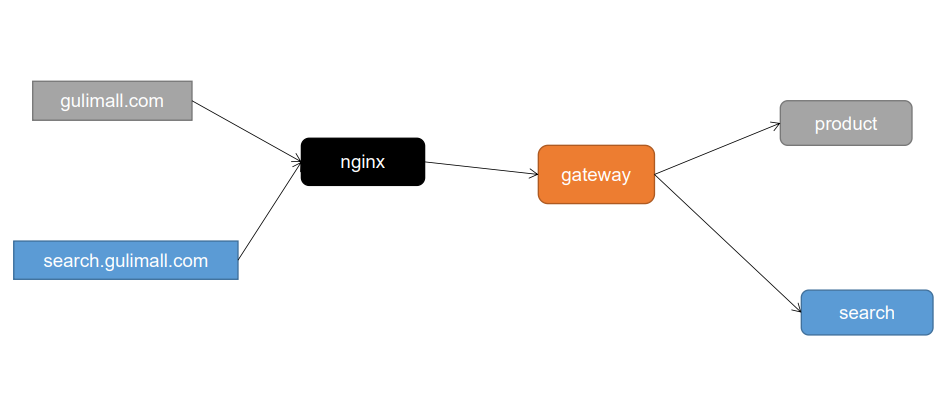
要求是 : 访问gulimall.com 能访问到我们自己本机idea中启动的product服务
思路:我们通过配置本地的host域名映射我们虚拟机的中的nginx,然后nginx在根据转发规把请求转发回我们自己的idea中的本地服务。
前置说明:因为我们的nginx的安装在云服务器上的,本地Host文件解析域名后访问云服务器, 结果请求被拦截虽然可以用谷歌浏览器安装ModHeader插件解决,但是我们在把请求映射到nginx后,在让nginx转发回我们本地的服务是无法完成的,因为云服务器无法ping通我们本地的ip 原因 本地pc属于移动宽带的内网环境,说白了就是cmd下ipconfig里的ip是你电脑宽带运营商的一个大网络(外网)下的一个内网ip,服务器无法主动与内网ip建立连接,连路由都做不到。所以不可能ping通的。可以考虑使用VPN在您的电脑和服务器之间建立VPN连接,这样服务器和您的电脑就能像在同一个内网一样互相访问了
2.1配置本地host
可以利用SwitchHost配置工具。需要注意的是这个软件要用管理员打开,然后C:\Windows\System32\drivers\etc把hosts的文件权限放开,才能进行修改
如下图配置,前面是虚拟机的地址,后面是需要解析的域名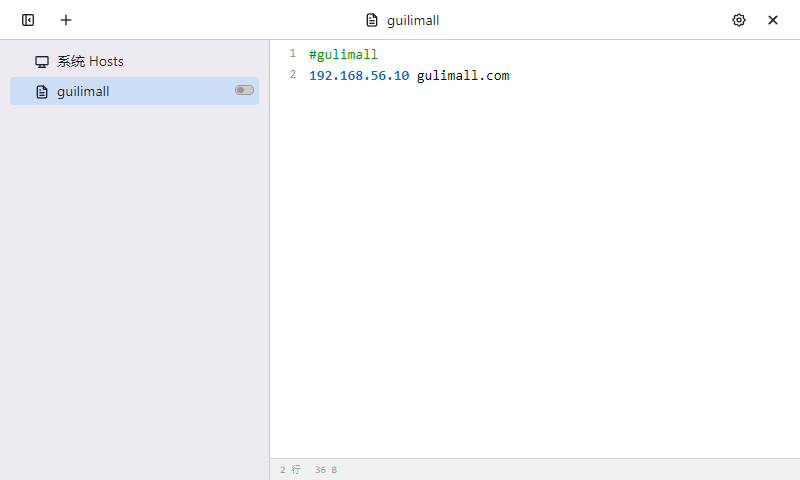
2.2配置nginx
# 查看我们nginx的总配置文件
[root@ecs-284198 conf]# cat /mydata/nginx/conf/nginx.conf

user  nginx;
worker_processes  1;

error_log  /var/log/nginx/error.log warn;
pid        /var/run/nginx.pid;
events {
    worker_connections  1024;
}
http {
    include       /etc/nginx/mime.types;
    default_type  application/octet-stream;

    log_format  main  '$remote_addr - $remote_user [$time_local] "$request" '
                      '$status $body_bytes_sent "$http_referer" '
                      '"$http_user_agent" "$http_x_forwarded_for"';

    access_log  /var/log/nginx/access.log  main;
    sendfile        on;
    #tcp_nopush     on;
    keepalive_timeout  65;

    #gzip  on;

    include /etc/nginx/conf.d/*.conf;
}
[root@ecs-284198 conf]#
# 当前总文件的最后一行 include /etc/nginx/conf.d/*.conf;  他会加载这个路径下的所有以 .conf结尾的文件作为配置文件,并且在包含到我们的当前的总配置文件中,这样就不会导致一个配置文件很大,所以接下来我们到 conf.d 的目录下新建一个gulimall.conf文件

# cd 到 /mydata/nginx/conf/conf.d/会有一个default.conf,然后我们复制一个default.conf为gulimall.conf
[root@ecs-284198 conf.d]# cd  /mydata/nginx/conf/conf.d/
[root@ecs-284198 conf.d]# ll
total 8
-rw-r--r-- 1 root root 1097 Jan 31  2017 default.conf
-rw-r--r-- 1 root root 1065 Apr 28 21:56 gulimall.conf
[root@ecs-284198 conf.d]#

# 修改后的gulimall.conf 如下
server {
    listen       80;
    server_name  gulimall.com;

    #charset koi8-r;
    #access_log  /var/log/nginx/log/host.access.log  main;

    location / {
        proxy_pass  http://192.168.56.1:15000;
    }

    #error_page  404              /404.html;

    # redirect server error pages to the static page /50x.html
    #
    error_page   500 502 503 504  /50x.html;
    location = /50x.html {
        root   /usr/share/nginx/html;
    }

    # proxy the PHP scripts to Apache listening on 127.0.0.1:80
    #
    #location ~ \.php$ {
    #    proxy_pass   http://127.0.0.1;
    #}

    # pass the PHP scripts to FastCGI server listening on 127.0.0.1:9000
    #
    #location ~ \.php$ {
    #    root           html;
    #    fastcgi_pass   127.0.0.1:9000;
    #    fastcgi_index  index.php;
    #    fastcgi_param  SCRIPT_FILENAME  /scripts$fastcgi_script_name;
    #    include        fastcgi_params;
    #}

    # deny access to .htaccess files, if Apache's document root
    # concurs with nginx's one
    #
    #location ~ /\.ht {
    #    deny  all;
    #}
}

# 其中 proxy_pass  http://192.168.56.1:15000; 中的IP使我们本地的ip,访问会我们自己本地idea启动的product服务
# 但是这样会有一个问题  如果我们的product服务有多个实列,就不好办了,其实这个proxy_pass  http://192.168.56.1:15000应该配置成我们的网卡 gateway, 让gateway负载均衡到我们的服务中去,下一节我们会解决这个问题
3.Nginx-搭建域名访问(负载就均衡到网关)
3.1修改总nginx的配置文件
# 在http 模块中配置 upstream
[root@ecs-284198 conf]# cat nginx.conf
user  nginx;
worker_processes  1;

error_log  /var/log/nginx/error.log warn;
pid        /var/run/nginx.pid;
events {
    worker_connections  1024;
}
http {
    include       /etc/nginx/mime.types;
    default_type  application/octet-stream;

    log_format  main  '$remote_addr - $remote_user [$time_local] "$request" '
                      '$status $body_bytes_sent "$http_referer" '
                      '"$http_user_agent" "$http_x_forwarded_for"';

    access_log  /var/log/nginx/access.log  main;

    sendfile        on;
    #tcp_nopush     on;

    keepalive_timeout  65;

    #gzip  on;


 +  upstream gulimall{
 +  server 192.168.56.1:88;
 + }
    include /etc/nginx/conf.d/*.conf;
}

# 配置文件中upstream 叫上有服务器 然后取了一个名字叫gulimall,然后里面的里面配置的是我们网关的地址,就是以后所有请求我们上游服务器gulimall 的地址都会转发到网关去
3.2修改gulimall.conf
# 在子配置文件gulimall.conf中,的location 块添加 proxy_set_header Host $host; 表示nginx在转发的时候把host也带上,如果不加,nginx会丢失请求头,host,cookies等信息  把原来请求我们product的服务改成proxy_pass  http://gulimall;其中 http://gulimall中的gulimall 就是我们在总配置文件中取的上游服务器的名字,

# 整配置文件的意思,就是监听到gulimall域名发送过来的80请求,都会转到上游服务器为gulimall中去,并且带上host信息,而上游服务器又是转发到网关的。
[root@ecs-284198 conf]# cat conf.d/gulimall.conf
server {
    listen       80;
    server_name  gulimall.com;

    #charset koi8-r;
    #access_log  /var/log/nginx/log/host.access.log  main;

    location / {
       + proxy_set_header Host $host;
       + proxy_pass  http://gulimall;
    }

    #error_page  404              /404.html;

    # redirect server error pages to the static page /50x.html
    #
    error_page   500 502 503 504  /50x.html;
    location = /50x.html {
        root   /usr/share/nginx/html;
    }
    # proxy the PHP scripts to Apache listening on 127.0.0.1:80
    #
    #location ~ \.php$ {
    #    proxy_pass   http://127.0.0.1;
    #}

    # pass the PHP scripts to FastCGI server listening on 127.0.0.1:9000
    #
    #location ~ \.php$ {
    #    root           html;
    #    fastcgi_pass   127.0.0.1:9000;
    #    fastcgi_index  index.php;
    #    fastcgi_param  SCRIPT_FILENAME  /scripts$fastcgi_script_name;
    #    include        fastcgi_params;
    #}
    # deny access to .htaccess files, if Apache's document root
    # concurs with nginx's one
    #
    #location ~ /\.ht {
    #    deny  all;
    #}
}
3.3修改gateway服务的yaml配置
spring:
cloud:
gateway:
routes:
# - id: test_route
# uri: https://www.baidu.com
# predicates:
# - Query=url,baidu
#
# - id: qq_route
# uri: https://www.qq.com
# predicates:
# - Query=url,qq
- id: product_route
uri: lb://gulimall-product
predicates:
- Path=/api/product/**,/hello
filters:
- RewritePath=/api/(?<segment>.*),/$\{segment}
- id: third_party_route
uri: lb://gulimall-third-party
predicates:
- Path=/api/thirdparty/**
filters:
- RewritePath=/api/thirdparty/(?<segment>.*),/$\{segment}
- id: member_route
uri: lb://gulimall-member
predicates:
- Path=/api/member/**
filters:
- RewritePath=/api/(?<segment>.*),/$\{segment}
- id: ware_route
uri: lb://gulimall-ware
predicates:
- Path=/api/ware/**
filters:
- RewritePath=/api/(?<segment>.*),/$\{segment}
- id: admin_route
uri: lb://renren-fast
predicates:
- Path=/api/**
filters:
- RewritePath=/api/(?<segment>.*),/renren-fast/$\{segment}
# 注意要放最后
- id: gulimall_host_route
uri: lb://gulimall-product
predicates:
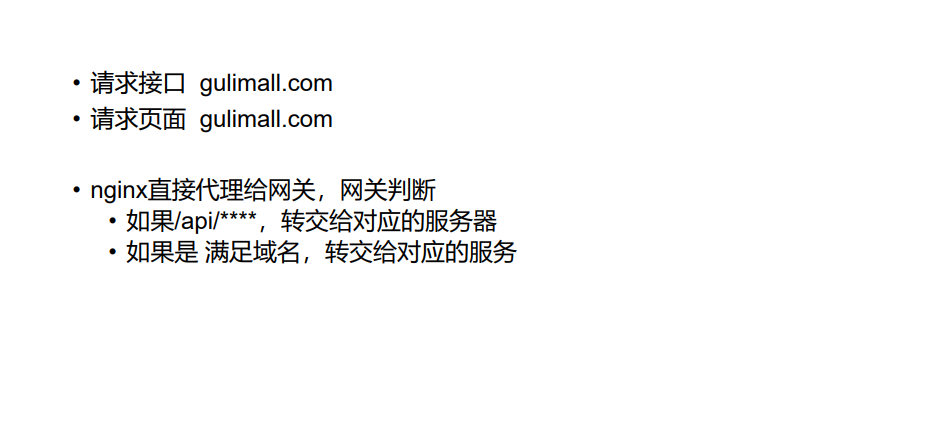
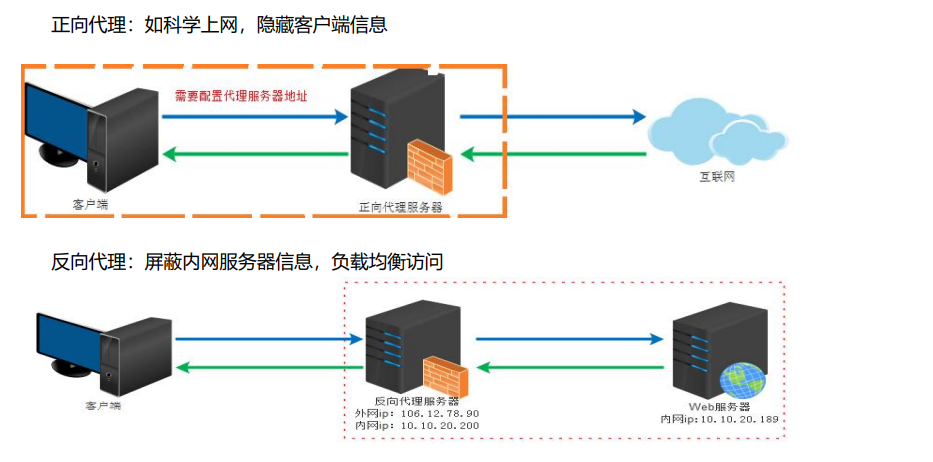
- Host=gulimall.com4.简单认识一下Nginx和工作原理
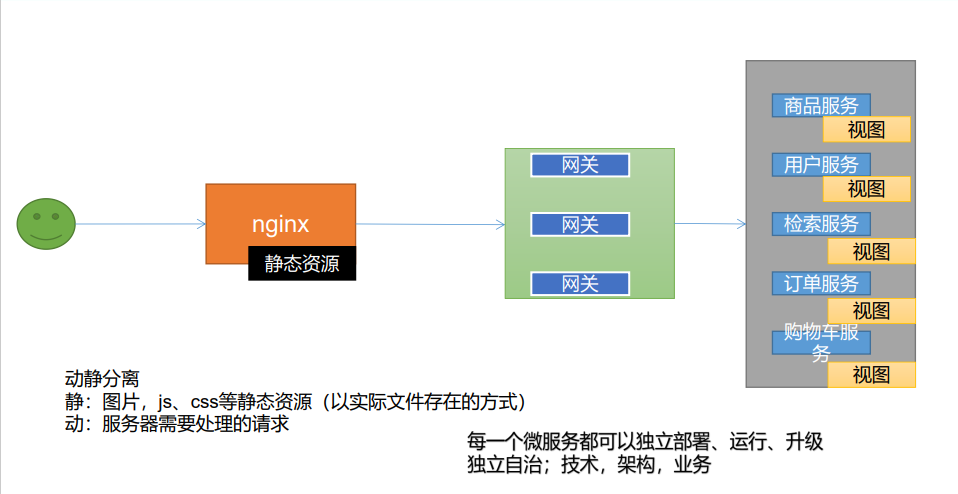


5.性能压测-优化-Nginx动静分离
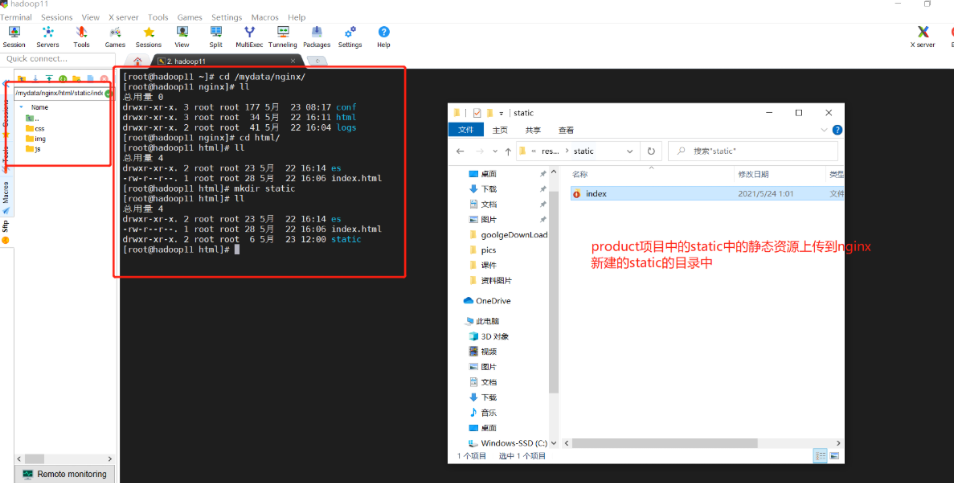
由于动态资源和静态资源目前都处于服务端,所以为了减轻服务器压力,我们将js、css、img等静态资源放置在Nginx端,以减轻服务器压力。
5.1动静态文件上传到 mydata/nginx/html/static/index/css,这种格式
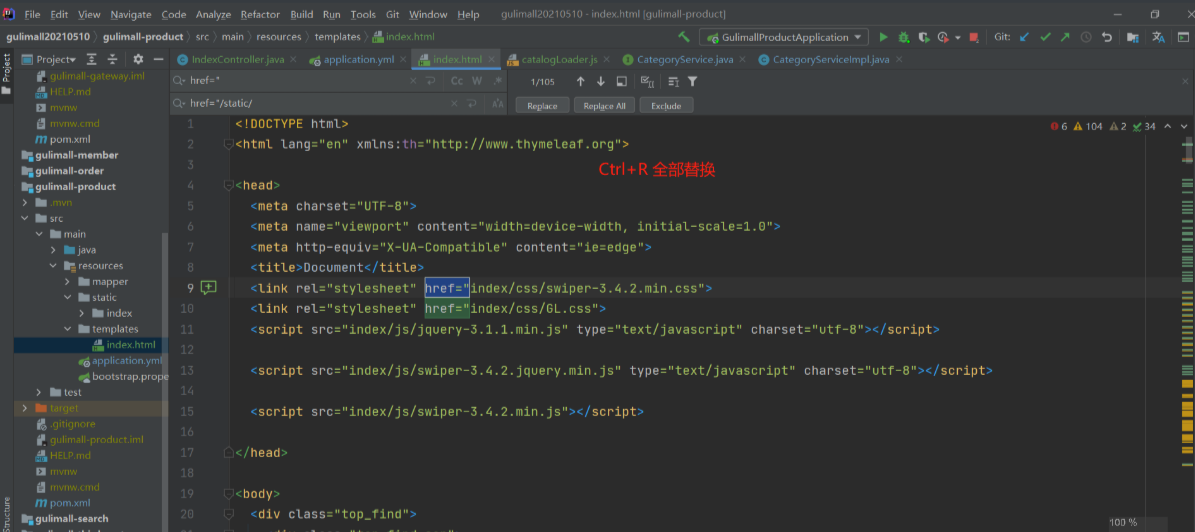
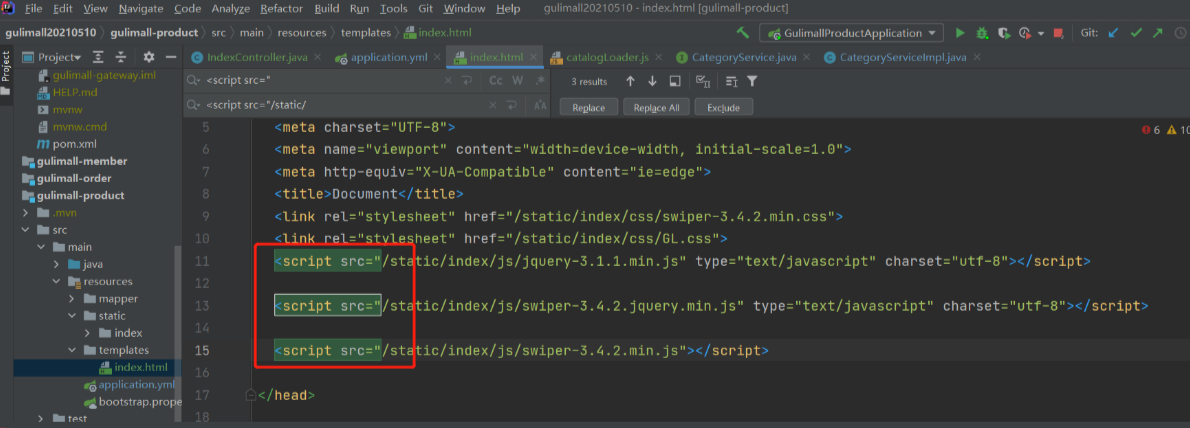
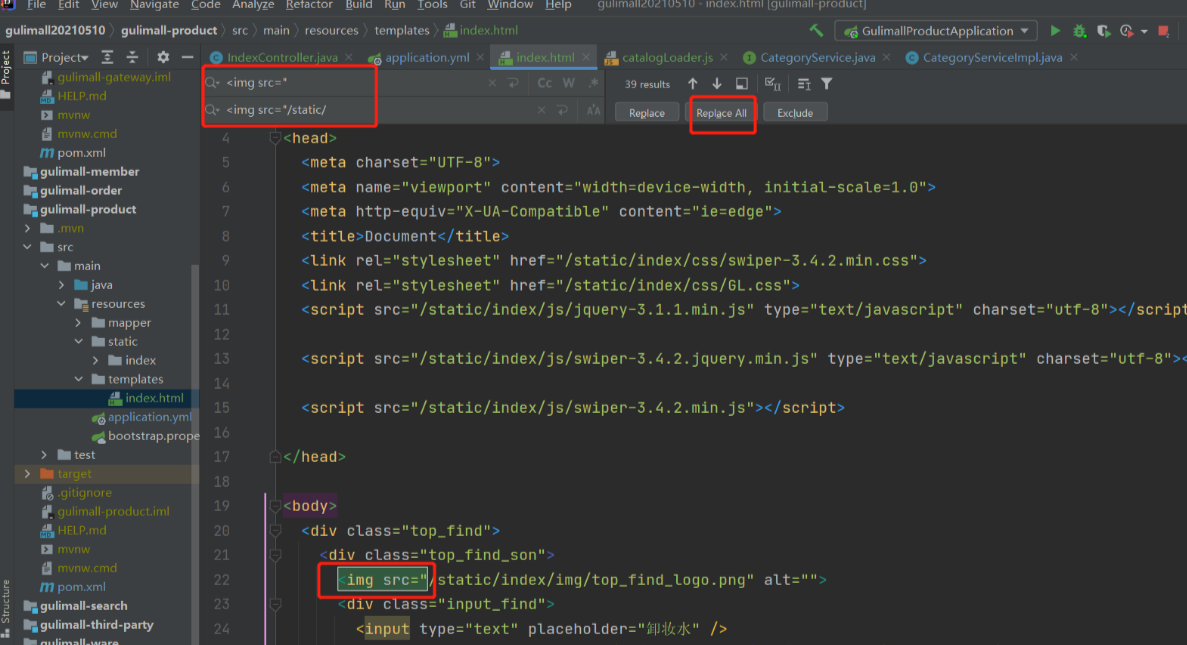
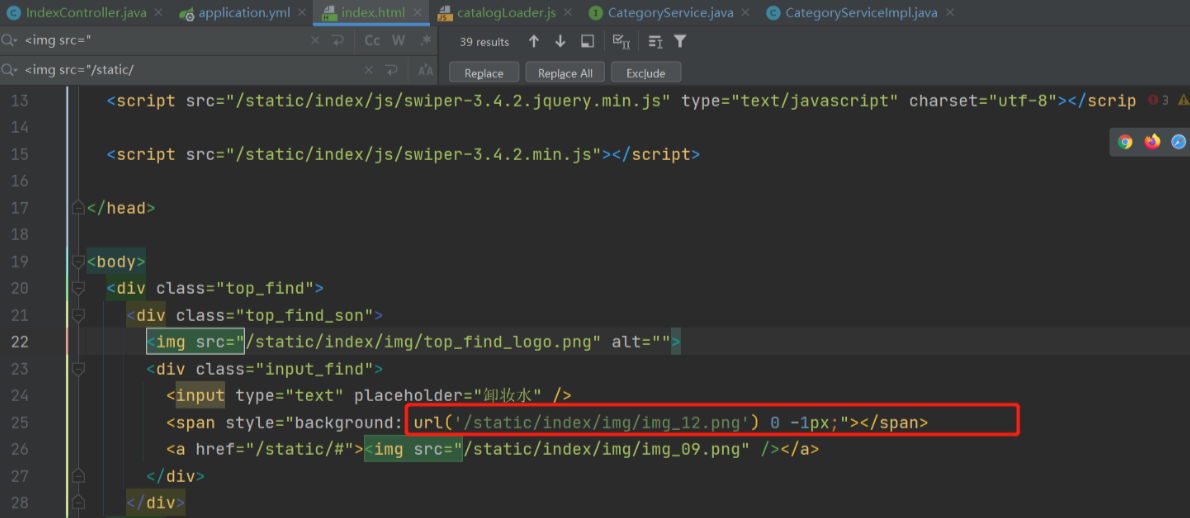
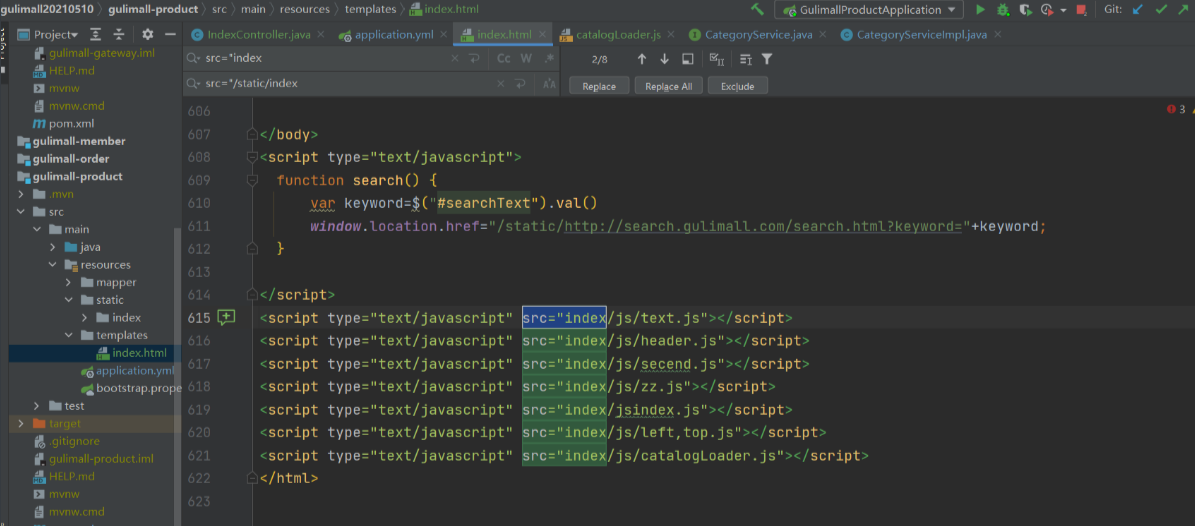
5.2修改index.html的静态资源路径
修改index.html的静态资源路径,加上static前缀src=“/static/index/img/img_09.png”
5.3修改/mydata/nginx/conf/conf.d/gulimall.conf
如果遇到有/static为前缀的请求,转发至html文件夹
location /static/ {
    root   /usr/share/nginx/html;
}


location / {
    proxy_pass http://gulimall;
    proxy_set_header Host $host;
}
评论